The key to this kind of soldering is practice and understanding how the solder should flow. If it flows too slowly (kind of blobby) the heat is too low. If it just burns off or runs away quickly, it’s too hot.
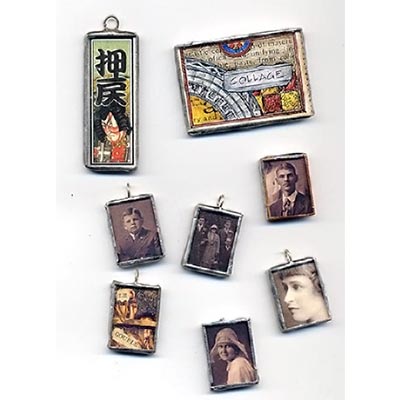
- Cut-up photos or other ephemera to the same size as the glass. Consider this either a photo charm or a collage charm and be sure to make it look good on the reverse as there’s glass there too.
- Make a sandwich of 2 glass pieces with the photos/ephemera between.
- Pull out a few inches of copper foil tape (width depends on thickness of glass). Lay out the copper foil tape and then place your glass sandwich onto it, centered right and left.
- Very tightly pull the tape around the glass, being sure that it stays centered.
- Cut the tape so that it overlaps about 1/4″
- Use a bone folder or wooden fid to make sure the tape is stuck to the glass all the way around and is secure on the front and back.
- Heat your soldering iron.
- Place the glass sandwich in a vise or use a clothespin, or something else. The idea is to hold the charm on its side so that the solder will flow along the top edge. It’s too hot to hold in your hand so I use a little mini bench vise to hold the charm.
- Use a Q-tip to put flux all over the top edge and the front and back of the tape along the top edge (try not to get any on the other sides yet or the solder will have a high probability of dripping over the edge and then you’ll get into an endless loop of chasing the drop of solder).
- Some people like to ‘paint’ their solder on. Some like to melt it directly onto the tape. Either works, though ‘painting’ it on usually leaves a smaller bead and is usually called ‘tinning.’
- To ‘Paint’: Touch the tip of your soldering iron onto the solder. The idea is to transfer a little solder onto the tip of the iron. Then use the iron tip to transfer the solder onto the charm. Repeat if you didn’t get enough solder.
- To Melt Directly: Place the tip of the solder (still on the roll) onto the tape and then sort of ‘chase’ it down the tape with the iron. If the iron is at the right temperature the solder will melt instantly and you’ll have a nice thick bead all the way down the tape in one pass.
- Repeat on the other 3 edges.
- When you’re done, fix up any areas than didn’t get completely covered (usually the front and back of the charm) by just pulling a little solder over from the sides. This takes a little practice. You’ll find yourself messing up the sides to fix the front until you get better at it. Try to keep your iron directly off the sides.
- Solder a jump ring to the top and that’s your bale. I like to install my jump ring by holding it in a pair of flatnose pliers in my left hand and then just quickly re-melting the solder and placing the ring instantly. It takes practice.
- You can clean up your charms by using rubbing alcohol on a Q-tip (to get rid of the flux) and then steel wool (0000 grit or so) to remove the oxidized solder (the crumbly black stuff). When you are done seal the edges with Carnauba wax (a hard automobile wax).